> ## Documentation Index
> Fetch the complete documentation index at: https://xrlive.mintlify.site/llms.txt
> Use this file to discover all available pages before exploring further.
# Test in the Editor
> Run the visual inside the Unreal Engine editor and use a key toggle to access the operator controls
With all controls wired you can run the visual directly inside the Unreal Engine editor to verify everything works before packaging.
The behavior described on this page is **specific to editor testing**. When the visual runs inside xRLive, the operator dashboard and the game window are two separate windows in the same process — the controls are always accessible and this overlap does not occur.
***
## Run in a separate window
By default, Unreal Engine runs PIE (Play In Editor) embedded inside the editor viewport. For testing a visual it is more practical to open a **New Editor Window** — a standalone window that floats freely so you can keep the EventGraph and the preview visible side by side.
Click the small **arrow** next to the Play button in the toolbar and select **New Editor Window (PIE)**.
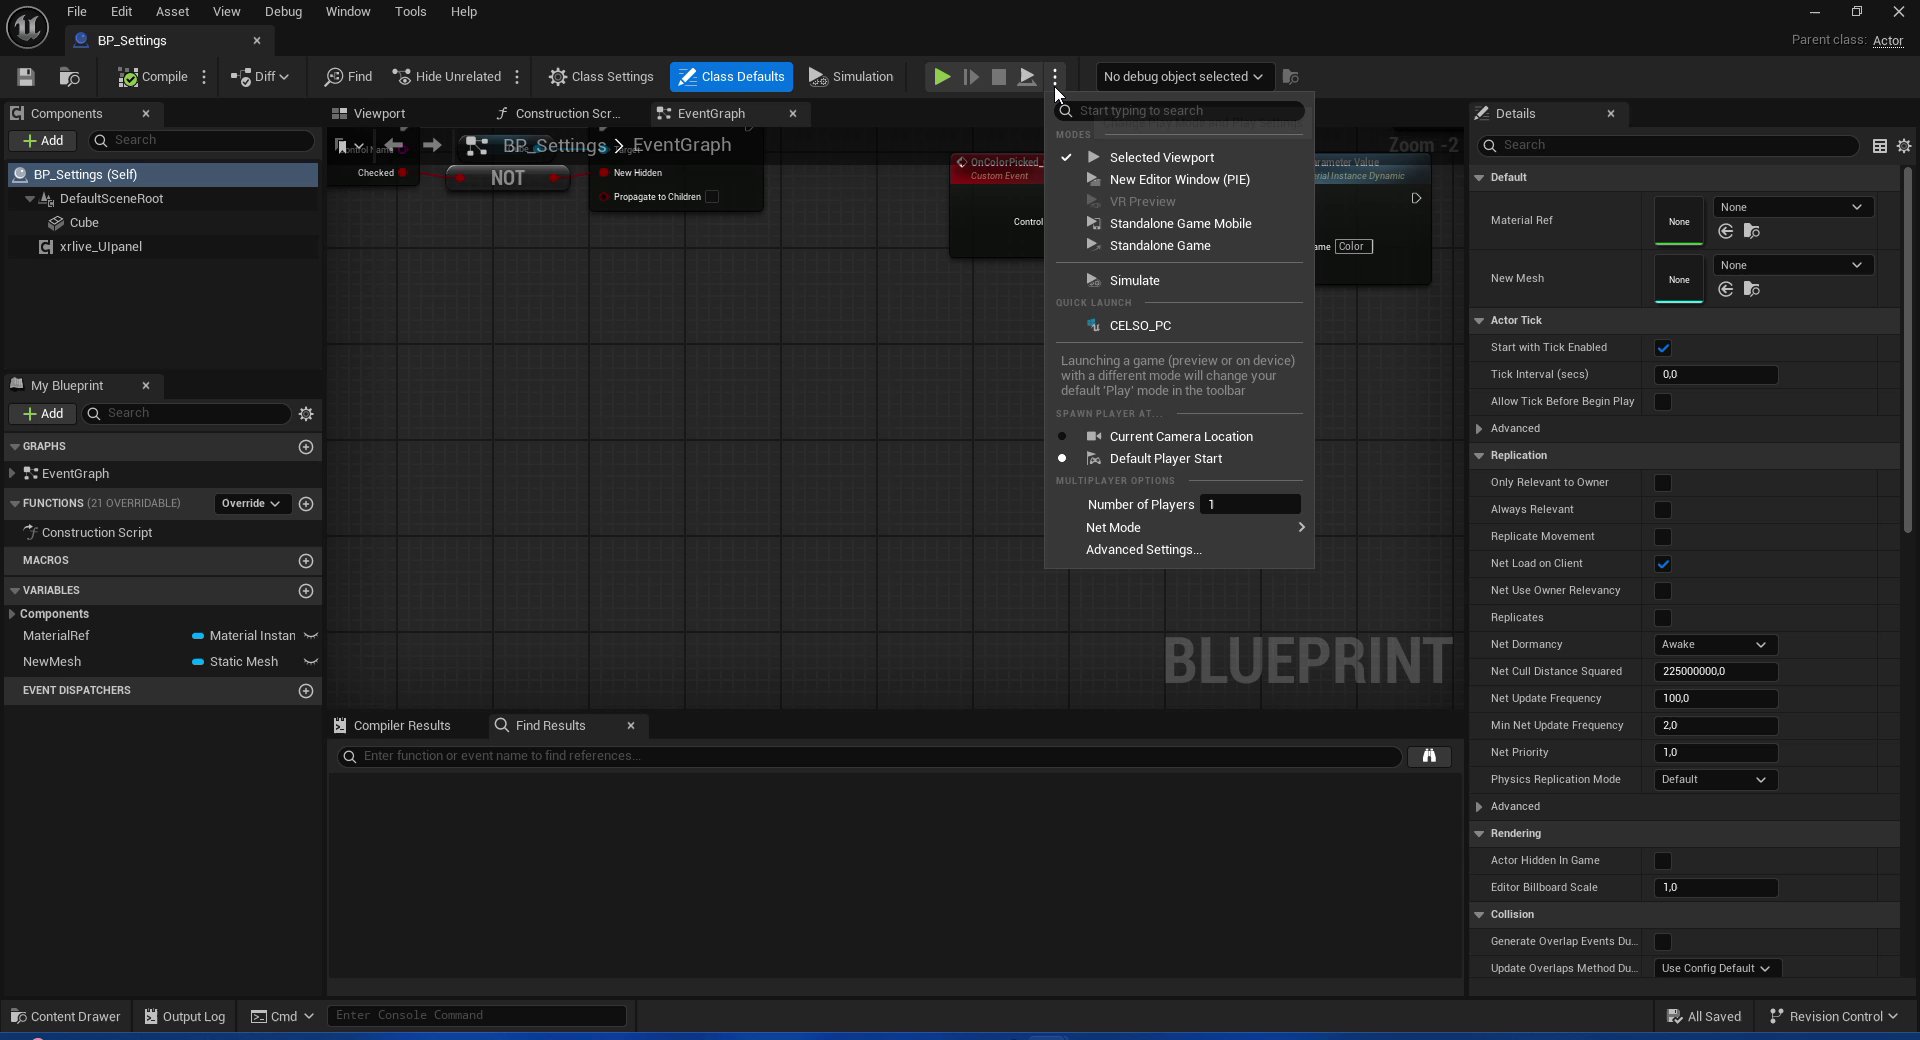 The preview window opens as a separate floating window. You can resize and reposition it freely while keeping `BP_Settings` open in the editor behind it.
Unreal remembers the last Play mode used. After selecting **New Editor Window (PIE)** once, pressing the Play button directly will reuse it on subsequent runs.
***
## Why the controls are not clickable on the first run
Press **Play** (or **Alt + P**) to launch the preview window. The operator panel appears with all the controls from `UICategories`, but clicking any slider, checkbox, or dropdown has no effect — the camera moves instead.
The preview window opens as a separate floating window. You can resize and reposition it freely while keeping `BP_Settings` open in the editor behind it.
Unreal remembers the last Play mode used. After selecting **New Editor Window (PIE)** once, pressing the Play button directly will reuse it on subsequent runs.
***
## Why the controls are not clickable on the first run
Press **Play** (or **Alt + P**) to launch the preview window. The operator panel appears with all the controls from `UICategories`, but clicking any slider, checkbox, or dropdown has no effect — the camera moves instead.
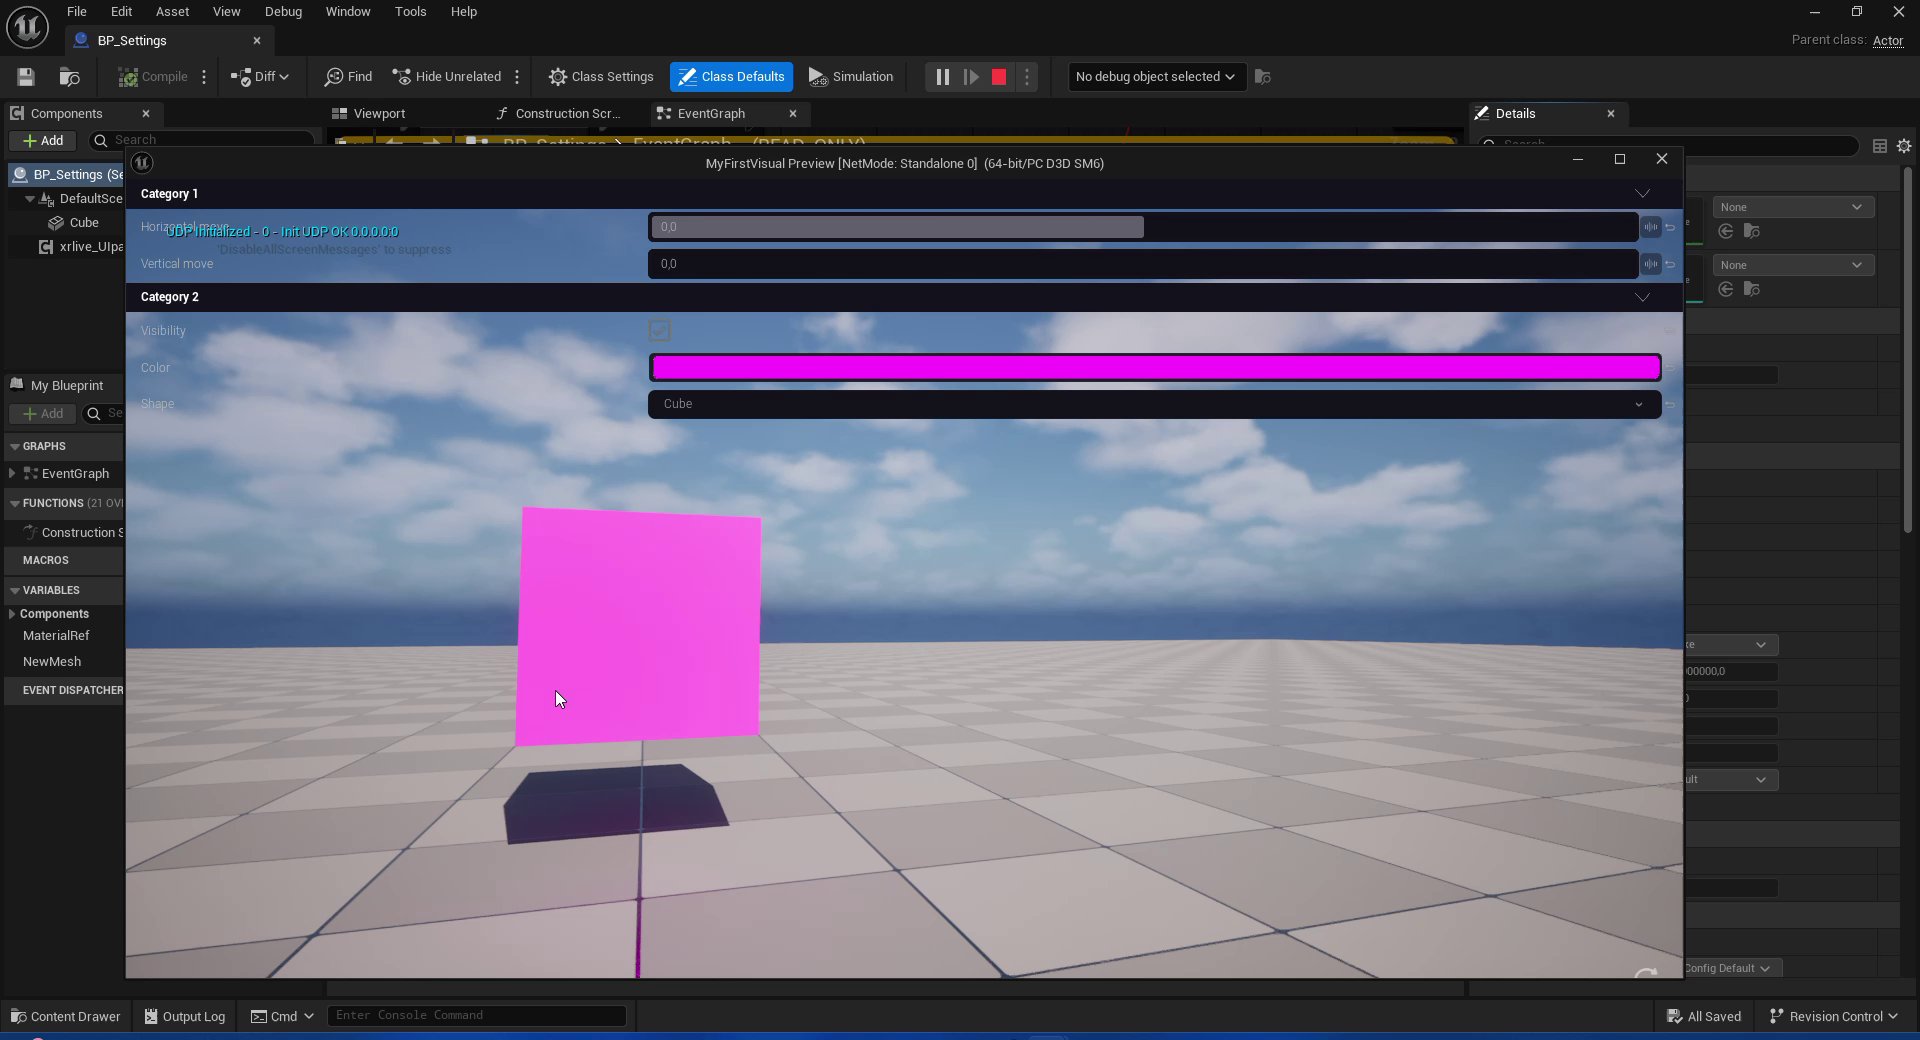 This happens because the `xRLive_Viewport` widget and the `xRLive_CustomPanel` widget both render inside the same game window during editor playback. The Viewport widget is rendered on top and captures mouse input for camera movement, making the operator controls underneath unreachable.
***
## Add a key toggle to the Viewport widget visibility
The fix is a key event in `BP_Settings` that toggles the Viewport widget's visibility at runtime. When the widget is **Collapsed** it is not rendered and does not capture input, giving full access to the operator controls. Pressing the key again restores it.
Open `BP_Settings` and go to the **EventGraph**.
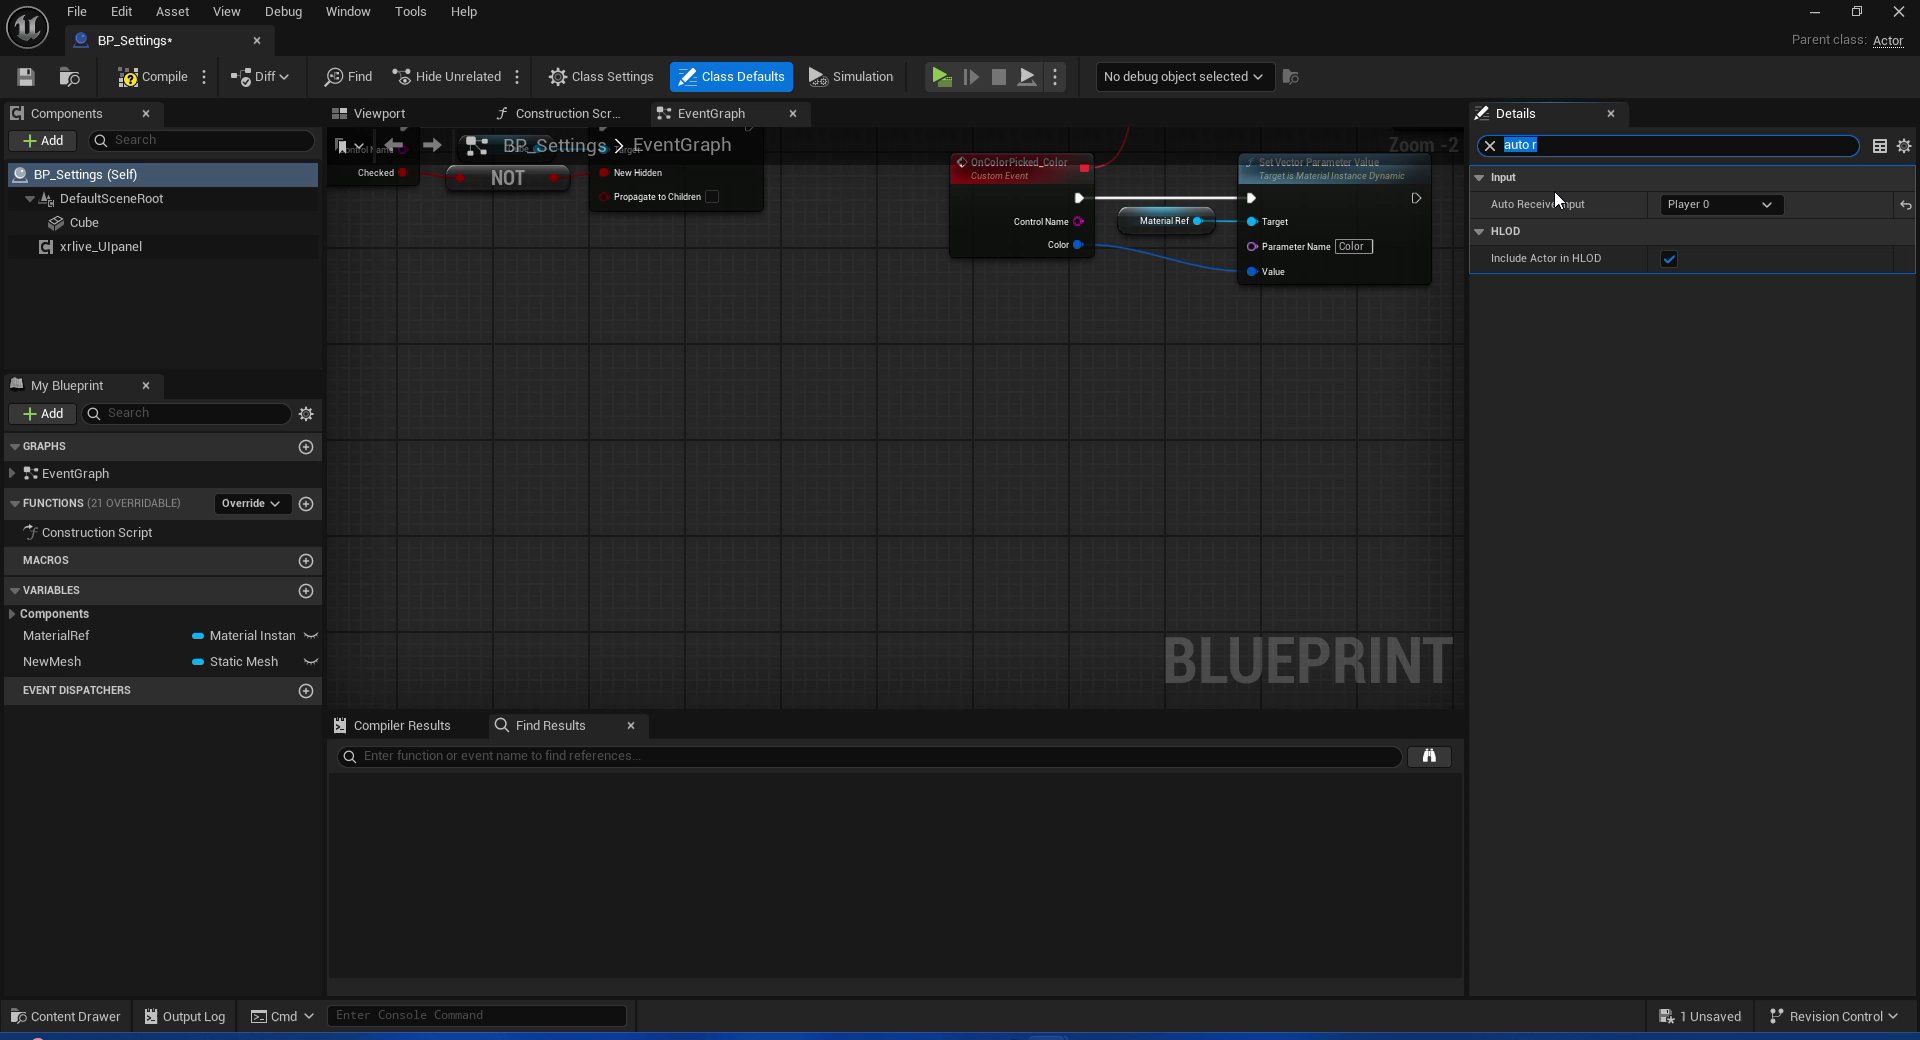
Keyboard events will not fire unless the Blueprint is configured to receive player input. In the **Components** panel, select **BP\_Settings (Self)** — the root entry at the top of the list. In the **Details** panel that appears on the right, type `auto` in the search box to filter the properties. Under the **Input** section you will see **Auto Receive Input** set to `Disabled`. Change it to **Player 0**.
This happens because the `xRLive_Viewport` widget and the `xRLive_CustomPanel` widget both render inside the same game window during editor playback. The Viewport widget is rendered on top and captures mouse input for camera movement, making the operator controls underneath unreachable.
***
## Add a key toggle to the Viewport widget visibility
The fix is a key event in `BP_Settings` that toggles the Viewport widget's visibility at runtime. When the widget is **Collapsed** it is not rendered and does not capture input, giving full access to the operator controls. Pressing the key again restores it.
Open `BP_Settings` and go to the **EventGraph**.
Keyboard events will not fire unless the Blueprint is configured to receive player input. In the **Components** panel, select **BP\_Settings (Self)** — the root entry at the top of the list. In the **Details** panel that appears on the right, type `auto` in the search box to filter the properties. Under the **Input** section you will see **Auto Receive Input** set to `Disabled`. Change it to **Player 0**.
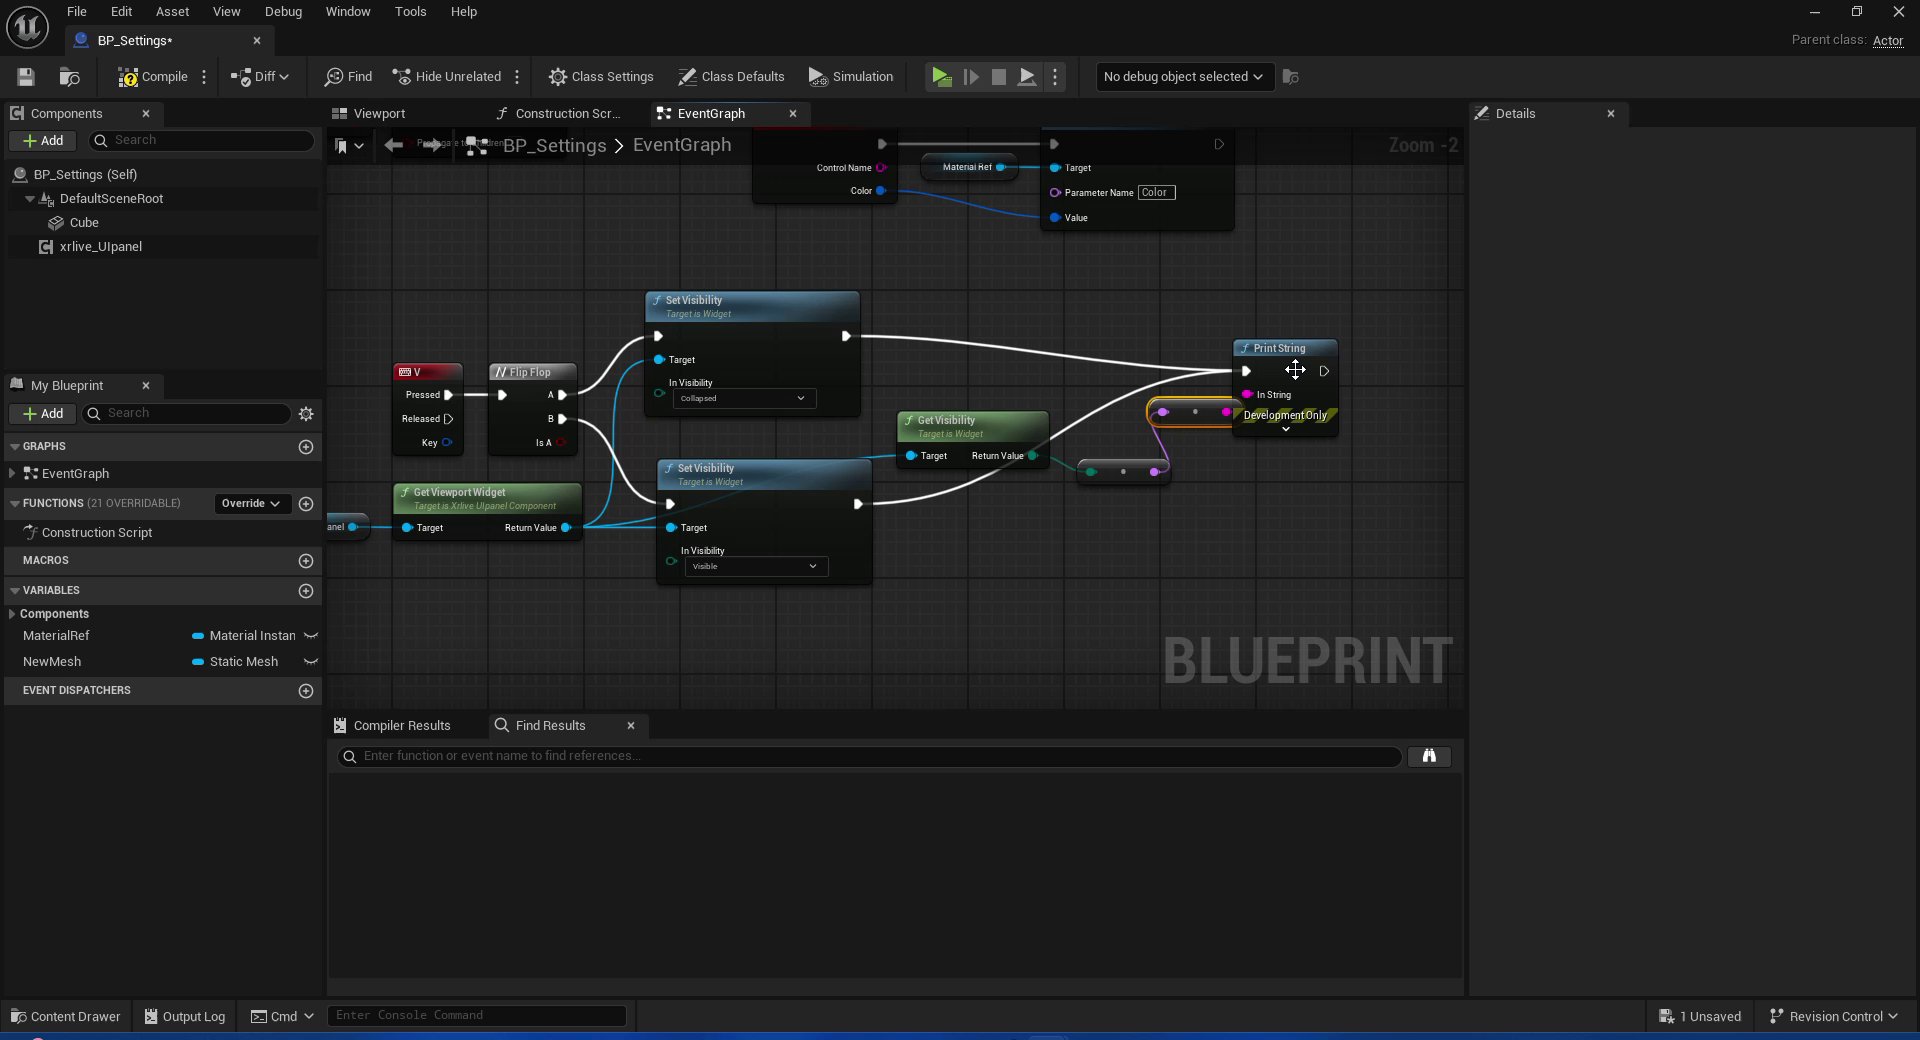
 Right-click on an empty area of the EventGraph and search for **Keyboard Events**. Choose a key that is easy to reach during testing — this tutorial uses **V**. Connect the **Pressed** output pin to the next node.
Drag off the **Pressed** pin and search for **Flip Flop**. This node alternates between two execution outputs (A and B) on each successive call — first press fires A, second press fires B, and so on.
Drag the **xrlive\_UIpanel** component from the Components panel into the EventGraph. From its output pin, search for **Get Viewport Widget** and select it. This returns a reference to the `xRLive_Viewport` widget instance that is currently rendered.
From the **A** output of Flip Flop, add **Set Visibility** and set **In Visibility** to **Collapsed**. Connect the **Return Value** of `Get Viewport Widget` to its **Target** pin.
From the **B** output of Flip Flop, add a second **Set Visibility** and set **In Visibility** to **Visible**. Connect the same `Get Viewport Widget` **Return Value** to its **Target** pin.
Right-click on an empty area of the EventGraph and search for **Keyboard Events**. Choose a key that is easy to reach during testing — this tutorial uses **V**. Connect the **Pressed** output pin to the next node.
Drag off the **Pressed** pin and search for **Flip Flop**. This node alternates between two execution outputs (A and B) on each successive call — first press fires A, second press fires B, and so on.
Drag the **xrlive\_UIpanel** component from the Components panel into the EventGraph. From its output pin, search for **Get Viewport Widget** and select it. This returns a reference to the `xRLive_Viewport` widget instance that is currently rendered.
From the **A** output of Flip Flop, add **Set Visibility** and set **In Visibility** to **Collapsed**. Connect the **Return Value** of `Get Viewport Widget` to its **Target** pin.
From the **B** output of Flip Flop, add a second **Set Visibility** and set **In Visibility** to **Visible**. Connect the same `Get Viewport Widget` **Return Value** to its **Target** pin.
 The key event approach is for **convenience during editor testing only** and does not need to be removed before packaging — it has no effect at runtime in xRLive. An alternative is to clear the Viewport widget reference directly in the `xrlive_UIpanel` **Details panel**, but this requires you to reassign it manually before the next test run. The key toggle is safer.
***
## Testing the controls
Press **Play**, then press **V** once to collapse the Viewport widget. The game scene becomes invisible and the operator controls are now fully interactive.
The key event approach is for **convenience during editor testing only** and does not need to be removed before packaging — it has no effect at runtime in xRLive. An alternative is to clear the Viewport widget reference directly in the `xrlive_UIpanel` **Details panel**, but this requires you to reassign it manually before the next test run. The key toggle is safer.
***
## Testing the controls
Press **Play**, then press **V** once to collapse the Viewport widget. The game scene becomes invisible and the operator controls are now fully interactive.
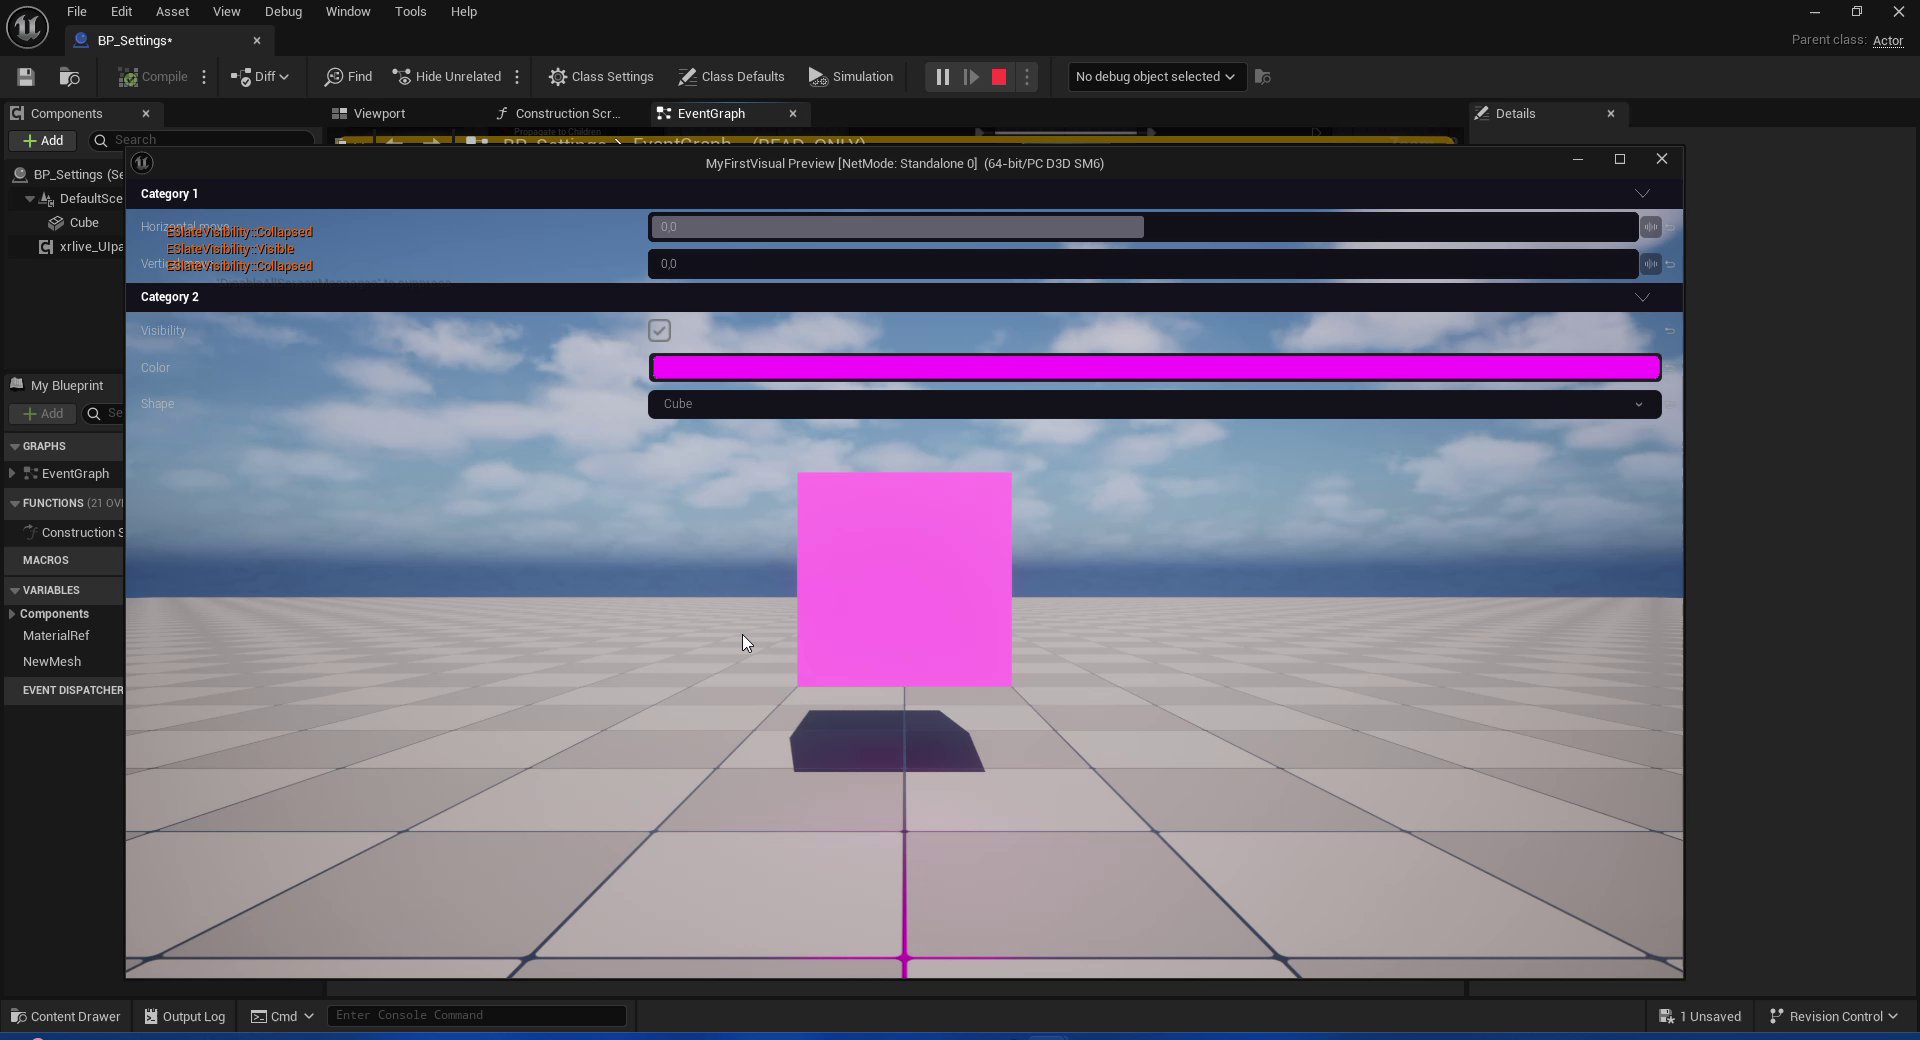 Use the controls to verify each wired behavior:
* **Horizontal move / Vertical move** — the shape moves along X and Y axes
* **Visibility** — toggles the shape on and off
* **Color** — changes the shape's material color in real time
* **Shape** — switches the mesh between Cube, Sphere, and Cylinder
Press **V** again to bring the Viewport widget back. Press **Escape** or click **Stop** to end the session.
Use the controls to verify each wired behavior:
* **Horizontal move / Vertical move** — the shape moves along X and Y axes
* **Visibility** — toggles the shape on and off
* **Color** — changes the shape's material color in real time
* **Shape** — switches the mesh between Cube, Sphere, and Cylinder
Press **V** again to bring the Viewport widget back. Press **Escape** or click **Stop** to end the session.