> ## Documentation Index
> Fetch the complete documentation index at: https://xrlive.mintlify.site/llms.txt
> Use this file to discover all available pages before exploring further.
# Project Setup
> Create the Unreal Engine project, the plugin, and the main map
This module covers everything you need to do before writing a single Blueprint node: create the UE project, create the plugin that will hold your visual's content, add the xRLive SDK to the project, and save the main map in the right place.
The **project name**, the **plugin name**, and the **map name** must all be **exactly the same**. xRLive uses this name as a unique ID when mounting and loading your visual. Using different names will cause the visual to fail to load.
## 1. Create the Unreal Engine project
Open the **Unreal Project Browser** and create a new project with the following settings:
* **Template:** Blank
* **Project Defaults:** Blueprint (not C++)
* **Target Platform:** Desktop
* **Quality Preset:** Maximum
* **Starter Content:** off (unchecked)
* **Project Name:** the name you want for your visual — for this tutorial, `MyFirstVisual`
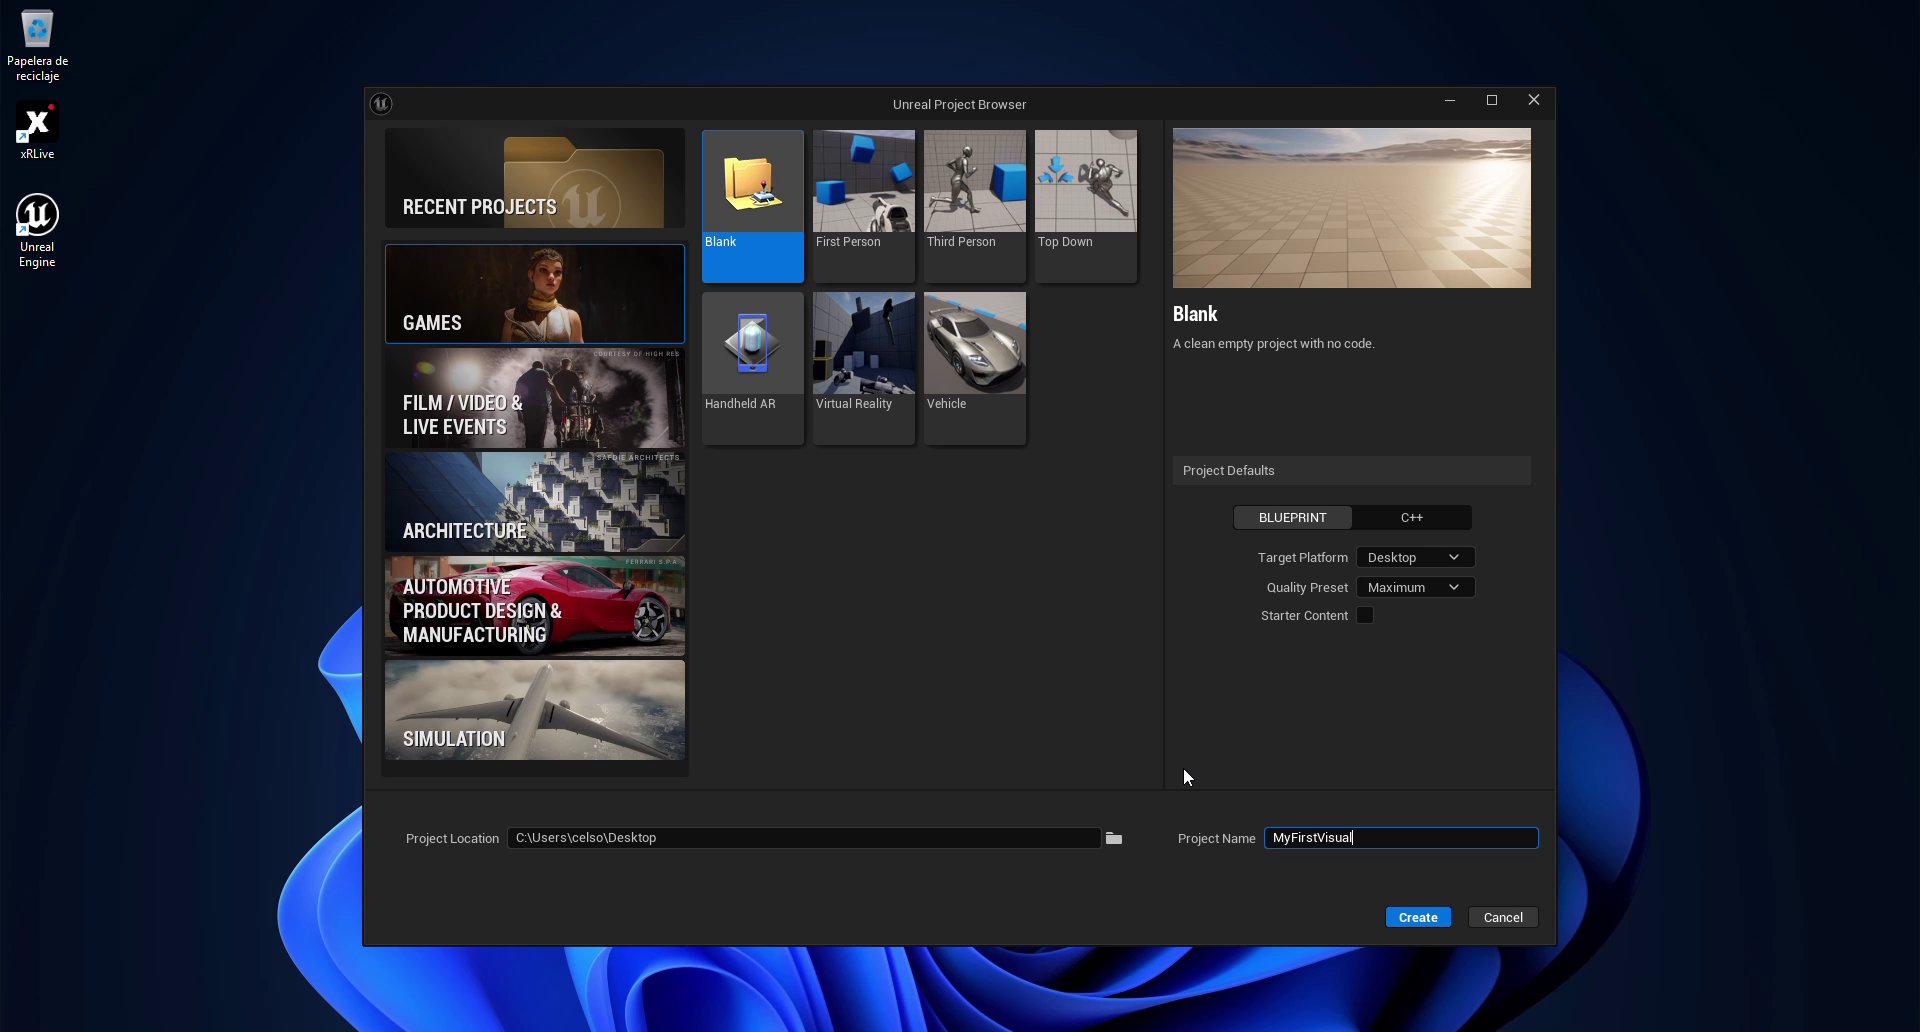 The project **must be Blueprint-only**. A C++ project cannot produce a valid `.xrlive` pak — C++ modules and compiled libraries are not included in the package and will cause the visual to fail at runtime.
Click **Create**. Unreal Engine creates the project and opens the editor with an untitled level and an empty Content folder.
## 2. Save a map to the root Content folder
The `.xrlive` packaging pipeline requires at least one map to exist in the project's root **Content** folder (not inside the plugin). This map does not need any content — it just needs to be saved there before packaging.
This map is **not created automatically** by Unreal Engine. You must save it manually. If it is missing when you package the visual, the generated `.xrlive` file may be empty and fail to load.
Go to **File → Save Level As**. In the dialog:
1. Make sure the folder tree on the left is set to **Content** — the path at the bottom should read `/All/Game`
2. Set the **Name** field to any name you like — the xRLive team uses `DefaultMap` by convention, but you can also leave the name that Unreal suggests by default
The project **must be Blueprint-only**. A C++ project cannot produce a valid `.xrlive` pak — C++ modules and compiled libraries are not included in the package and will cause the visual to fail at runtime.
Click **Create**. Unreal Engine creates the project and opens the editor with an untitled level and an empty Content folder.
## 2. Save a map to the root Content folder
The `.xrlive` packaging pipeline requires at least one map to exist in the project's root **Content** folder (not inside the plugin). This map does not need any content — it just needs to be saved there before packaging.
This map is **not created automatically** by Unreal Engine. You must save it manually. If it is missing when you package the visual, the generated `.xrlive` file may be empty and fail to load.
Go to **File → Save Level As**. In the dialog:
1. Make sure the folder tree on the left is set to **Content** — the path at the bottom should read `/All/Game`
2. Set the **Name** field to any name you like — the xRLive team uses `DefaultMap` by convention, but you can also leave the name that Unreal suggests by default
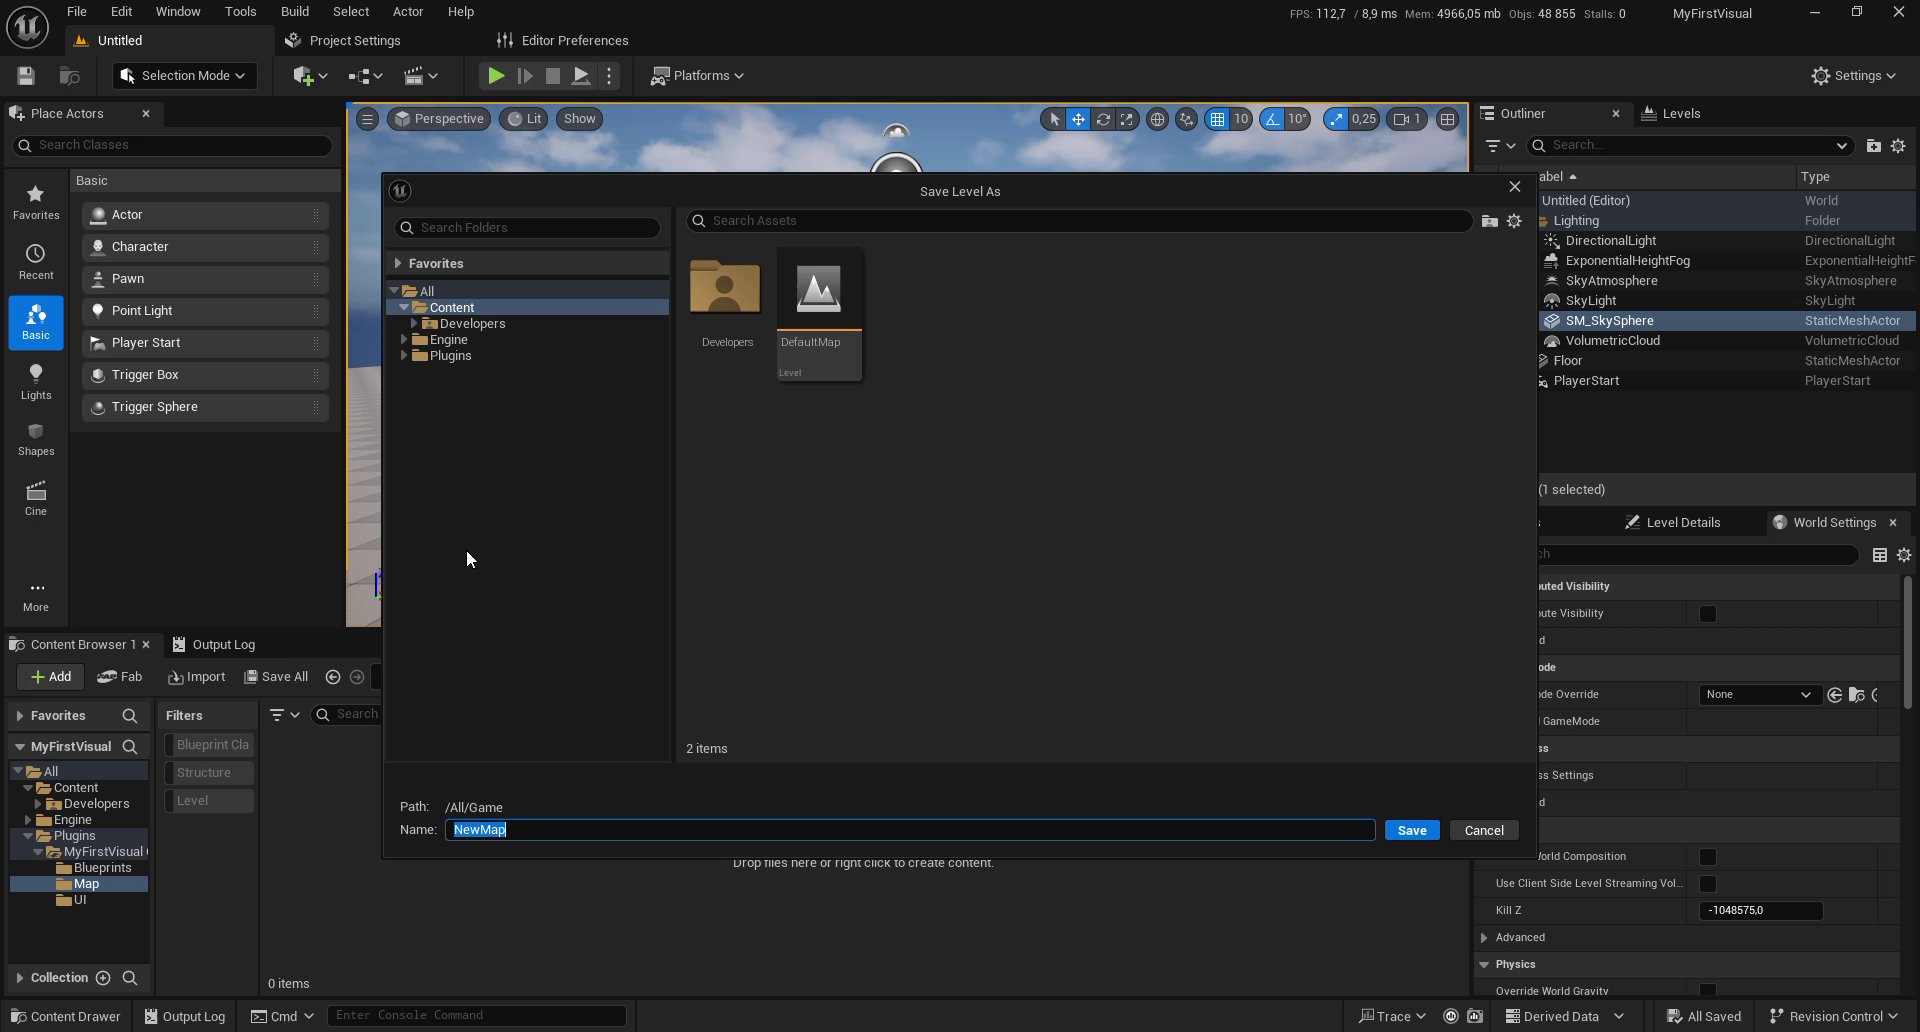 Click **Save**. The map will appear in the Content Browser under **Content**.
This map has no relation to your visual's logic. It is only required by the packaging pipeline. You will not edit it at any point in the tutorial.
## 3. Create the plugin
Your visual's content (Blueprints, maps, assets) lives inside a **plugin**, not in the project's main Content folder. This is required by the xRLive pak packaging system.
Open **Edit → Plugins** in the menu bar, then click **+ Add** (or **New Plugin**). In the plugin creation dialog:
* **Template:** Content Only
* **Plugin Name:** use the **exact same name** as your project — `MyFirstVisual`
* Leave all other fields at their defaults
Click **Save**. The map will appear in the Content Browser under **Content**.
This map has no relation to your visual's logic. It is only required by the packaging pipeline. You will not edit it at any point in the tutorial.
## 3. Create the plugin
Your visual's content (Blueprints, maps, assets) lives inside a **plugin**, not in the project's main Content folder. This is required by the xRLive pak packaging system.
Open **Edit → Plugins** in the menu bar, then click **+ Add** (or **New Plugin**). In the plugin creation dialog:
* **Template:** Content Only
* **Plugin Name:** use the **exact same name** as your project — `MyFirstVisual`
* Leave all other fields at their defaults
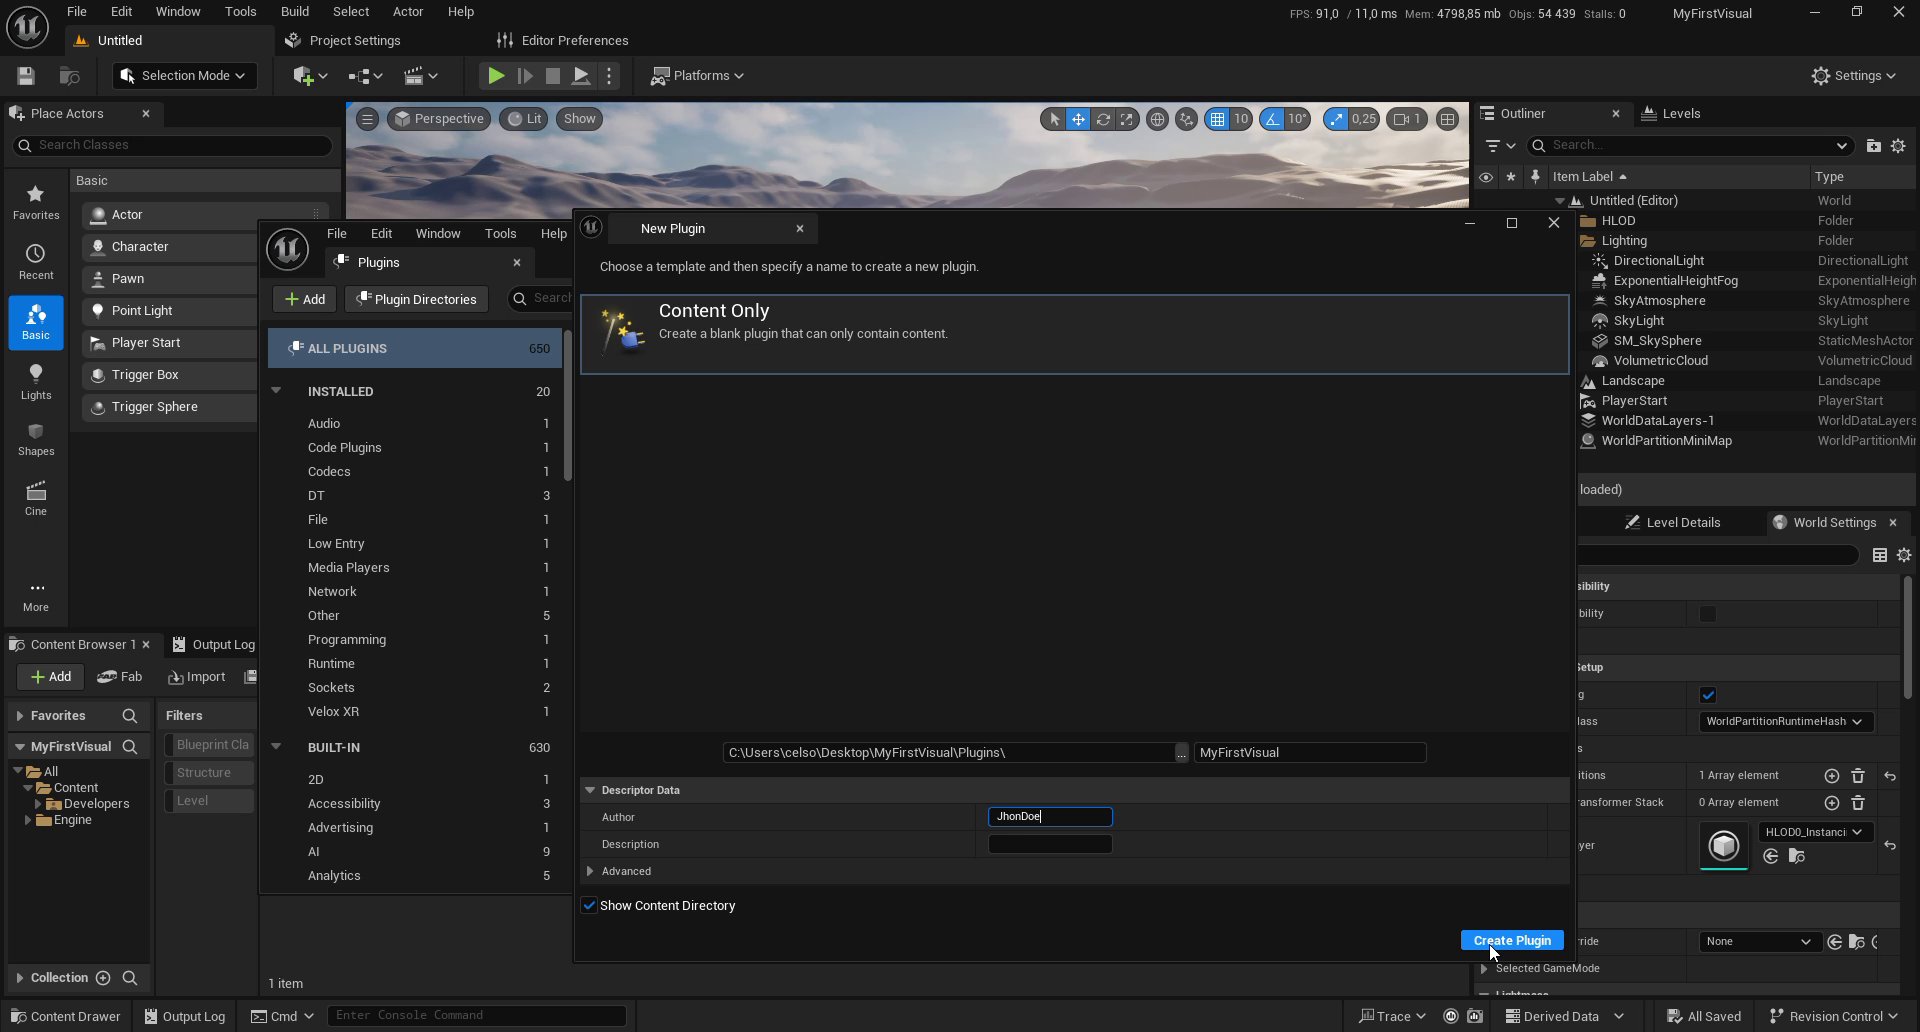 Click **Create Plugin**. Unreal adds the plugin and creates three folders inside it: `Blueprints`, `Map`, and `UI`.
The only folder that **must exist** is `Map` — xRLive requires it to locate the main map. All other folders are optional. That said, organizing your content into folders by asset type is strongly recommended as your visual grows:
| Folder | Contents |
| ------------ | ----------------------------------- |
| `Map` | Main level (required) |
| `Blueprints` | Actor Blueprints, components, logic |
| `UI` | Widget Blueprints (UMG) |
| `Materials` | Materials and Material Functions |
| `Textures` | Images, icons, and texture assets |
| `Data` | Data Tables and Data Assets |
| `Structs` | Structures and Enumerations |
## 4. Save the main map
The editor opens with an untitled default map. You need to save it with the correct name and **inside the plugin's `Map` folder**.
Go to **File → Save Level As**. In the dialog:
1. In the folder tree on the left, navigate to **Plugins → MyFirstVisual Content → Map**
2. Confirm the **Path** field reads `/All/Plugins/MyFirstVisual/Map`
3. Set the **Name** field to `MyFirstVisual` (same name as the project and plugin)
Click **Create Plugin**. Unreal adds the plugin and creates three folders inside it: `Blueprints`, `Map`, and `UI`.
The only folder that **must exist** is `Map` — xRLive requires it to locate the main map. All other folders are optional. That said, organizing your content into folders by asset type is strongly recommended as your visual grows:
| Folder | Contents |
| ------------ | ----------------------------------- |
| `Map` | Main level (required) |
| `Blueprints` | Actor Blueprints, components, logic |
| `UI` | Widget Blueprints (UMG) |
| `Materials` | Materials and Material Functions |
| `Textures` | Images, icons, and texture assets |
| `Data` | Data Tables and Data Assets |
| `Structs` | Structures and Enumerations |
## 4. Save the main map
The editor opens with an untitled default map. You need to save it with the correct name and **inside the plugin's `Map` folder**.
Go to **File → Save Level As**. In the dialog:
1. In the folder tree on the left, navigate to **Plugins → MyFirstVisual Content → Map**
2. Confirm the **Path** field reads `/All/Plugins/MyFirstVisual/Map`
3. Set the **Name** field to `MyFirstVisual` (same name as the project and plugin)
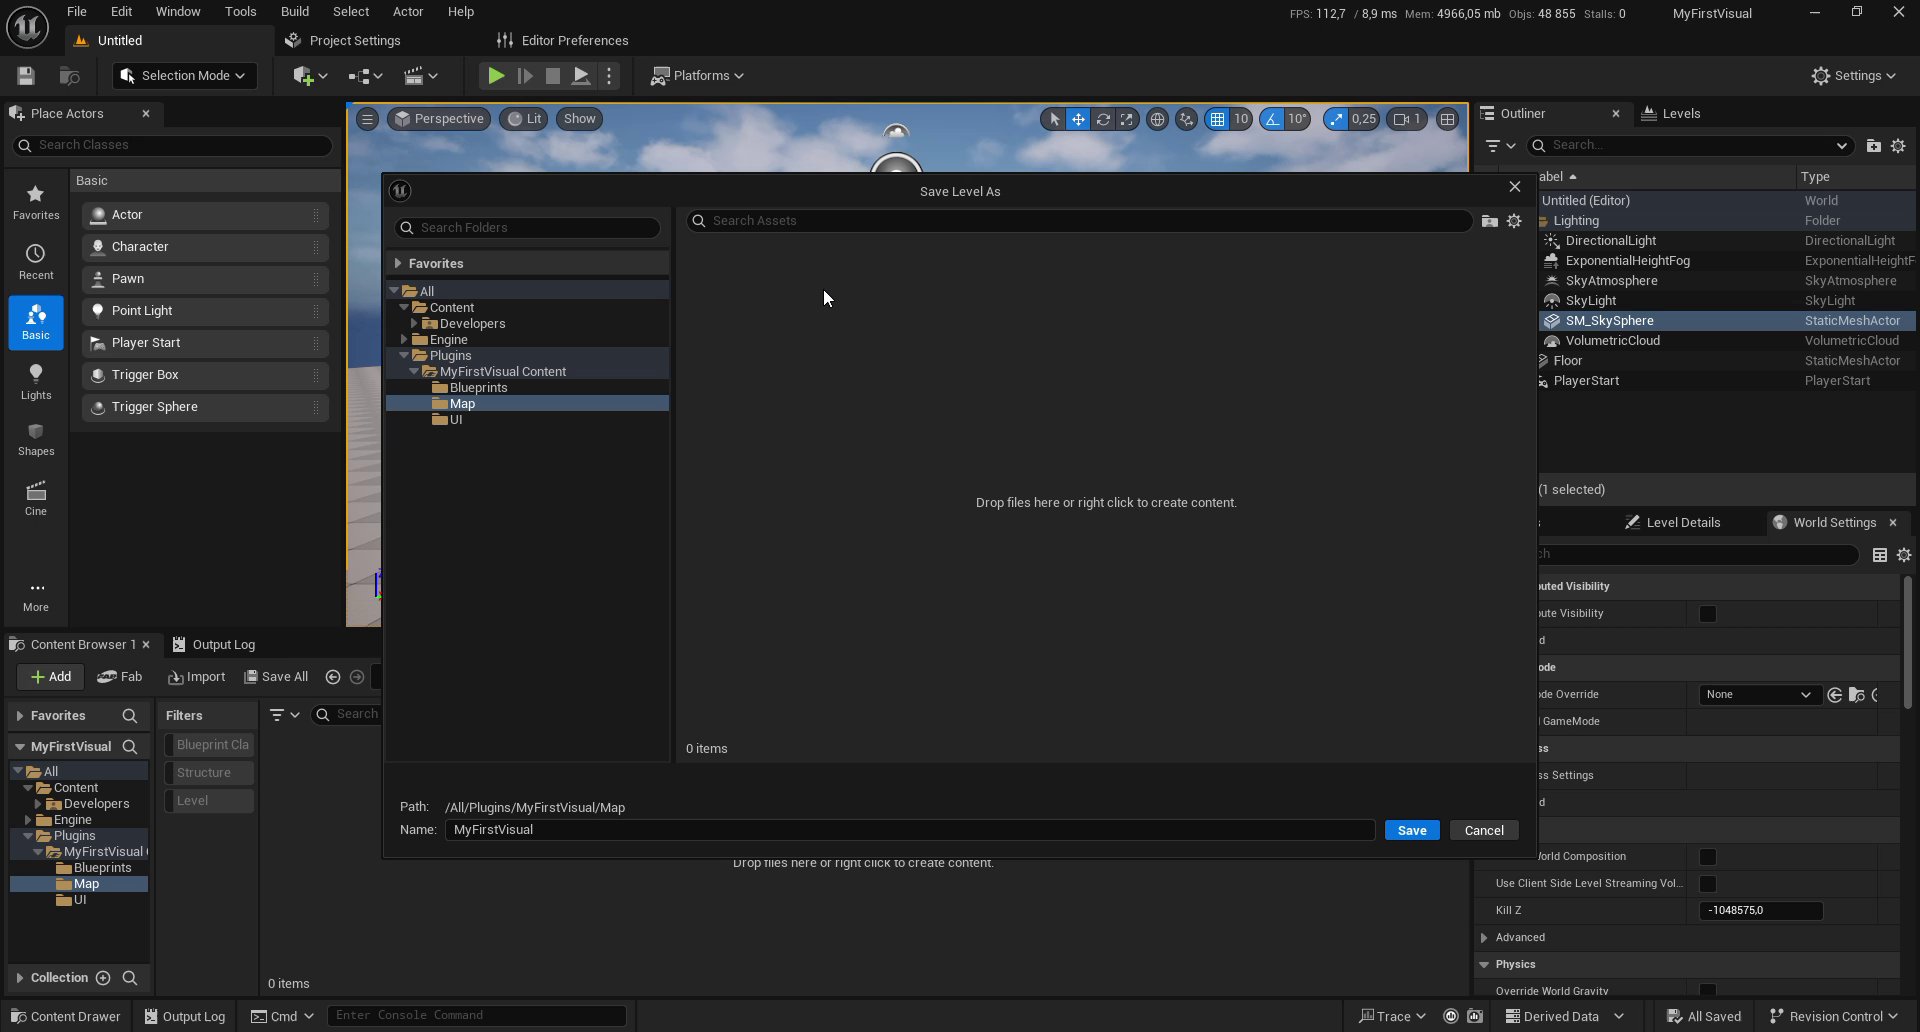 Click **Save**.
The **Map folder must exist** inside your plugin — Unreal creates it automatically when you use the **Content Only** plugin template. The main map (with the same name as the project) **must be inside this folder**. Everything else in the plugin folder structure is optional, but keeping `Blueprints`, `Map`, and `UI` as separate folders is recommended.
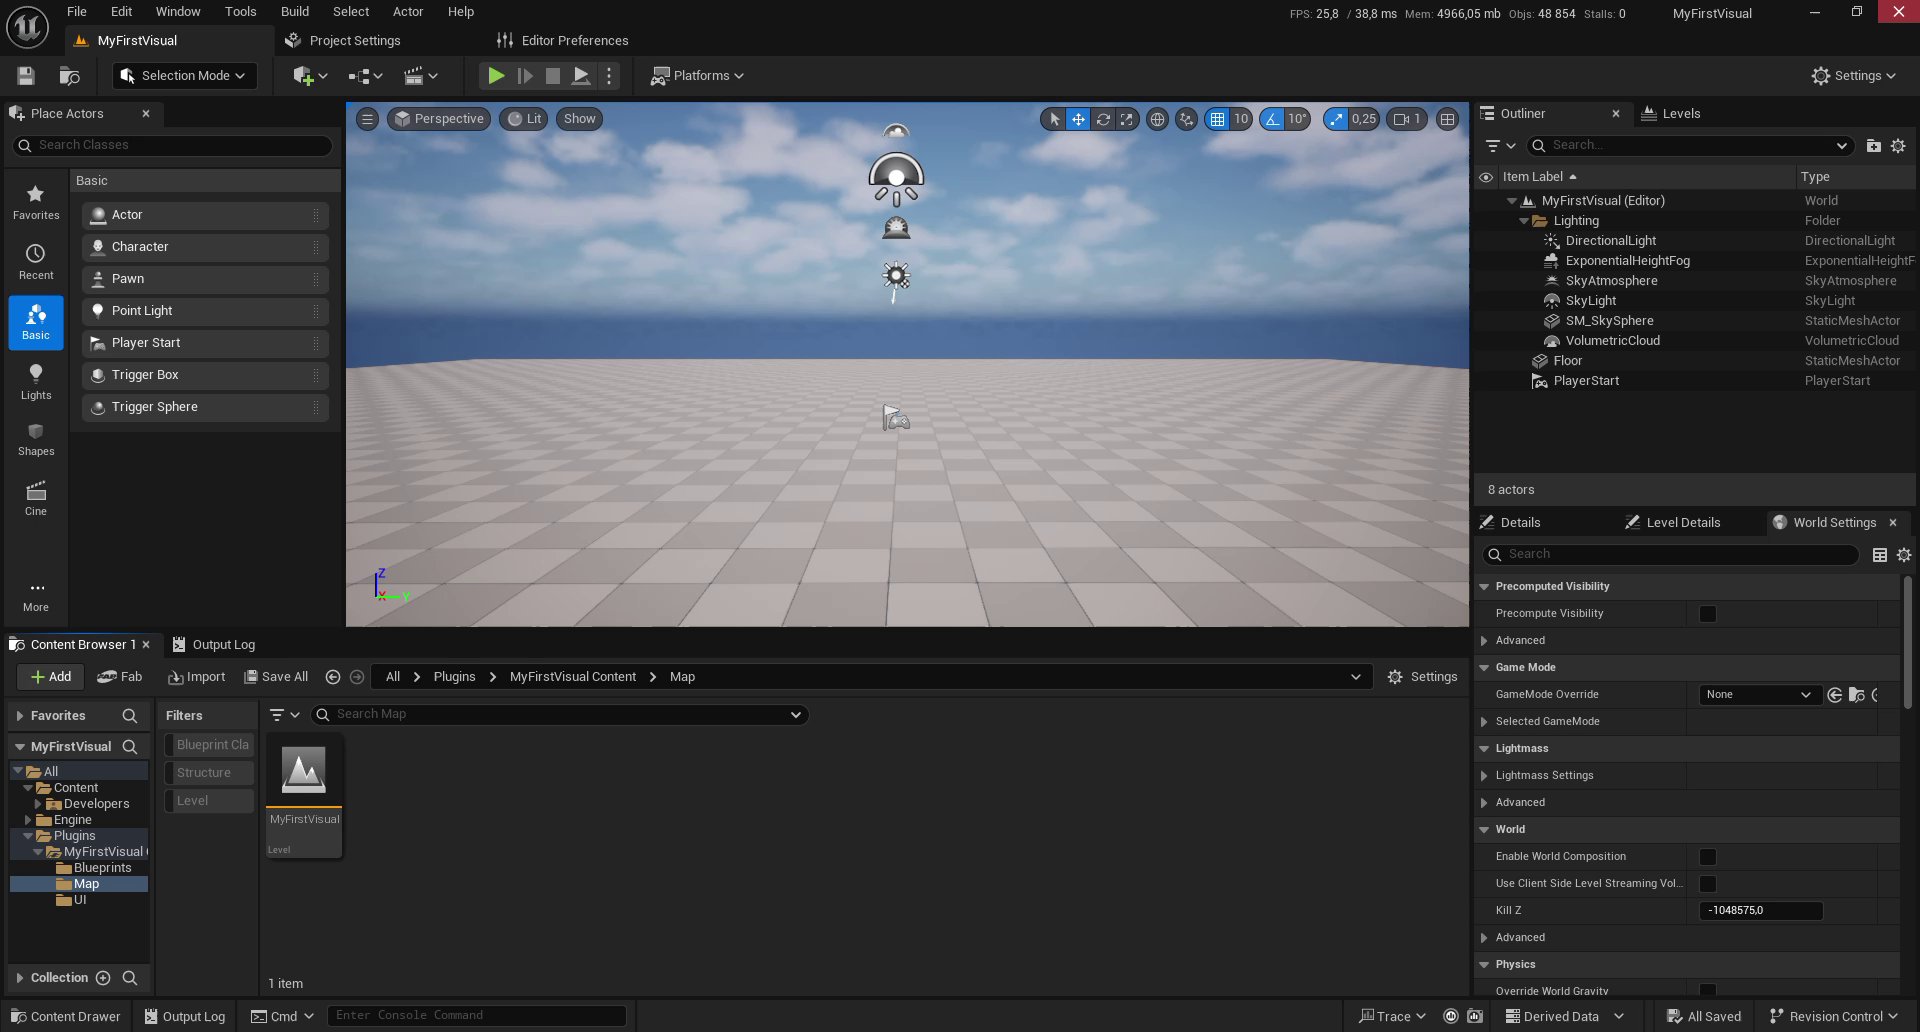
After saving, the Content Browser confirms the map is in the right place: `Plugins > MyFirstVisual Content > Map`.
Click **Save**.
The **Map folder must exist** inside your plugin — Unreal creates it automatically when you use the **Content Only** plugin template. The main map (with the same name as the project) **must be inside this folder**. Everything else in the plugin folder structure is optional, but keeping `Blueprints`, `Map`, and `UI` as separate folders is recommended.
After saving, the Content Browser confirms the map is in the right place: `Plugins > MyFirstVisual Content > Map`.
 ## 5. Add the xRLive SDK to the project
Close Unreal Engine. In Windows Explorer, navigate to your project folder (for example, `C:\Users\YourName\Desktop\MyFirstVisual`). Open the **Plugins** folder — it currently contains only the `MyFirstVisual` plugin folder you just created.
## 5. Add the xRLive SDK to the project
Close Unreal Engine. In Windows Explorer, navigate to your project folder (for example, `C:\Users\YourName\Desktop\MyFirstVisual`). Open the **Plugins** folder — it currently contains only the `MyFirstVisual` plugin folder you just created.
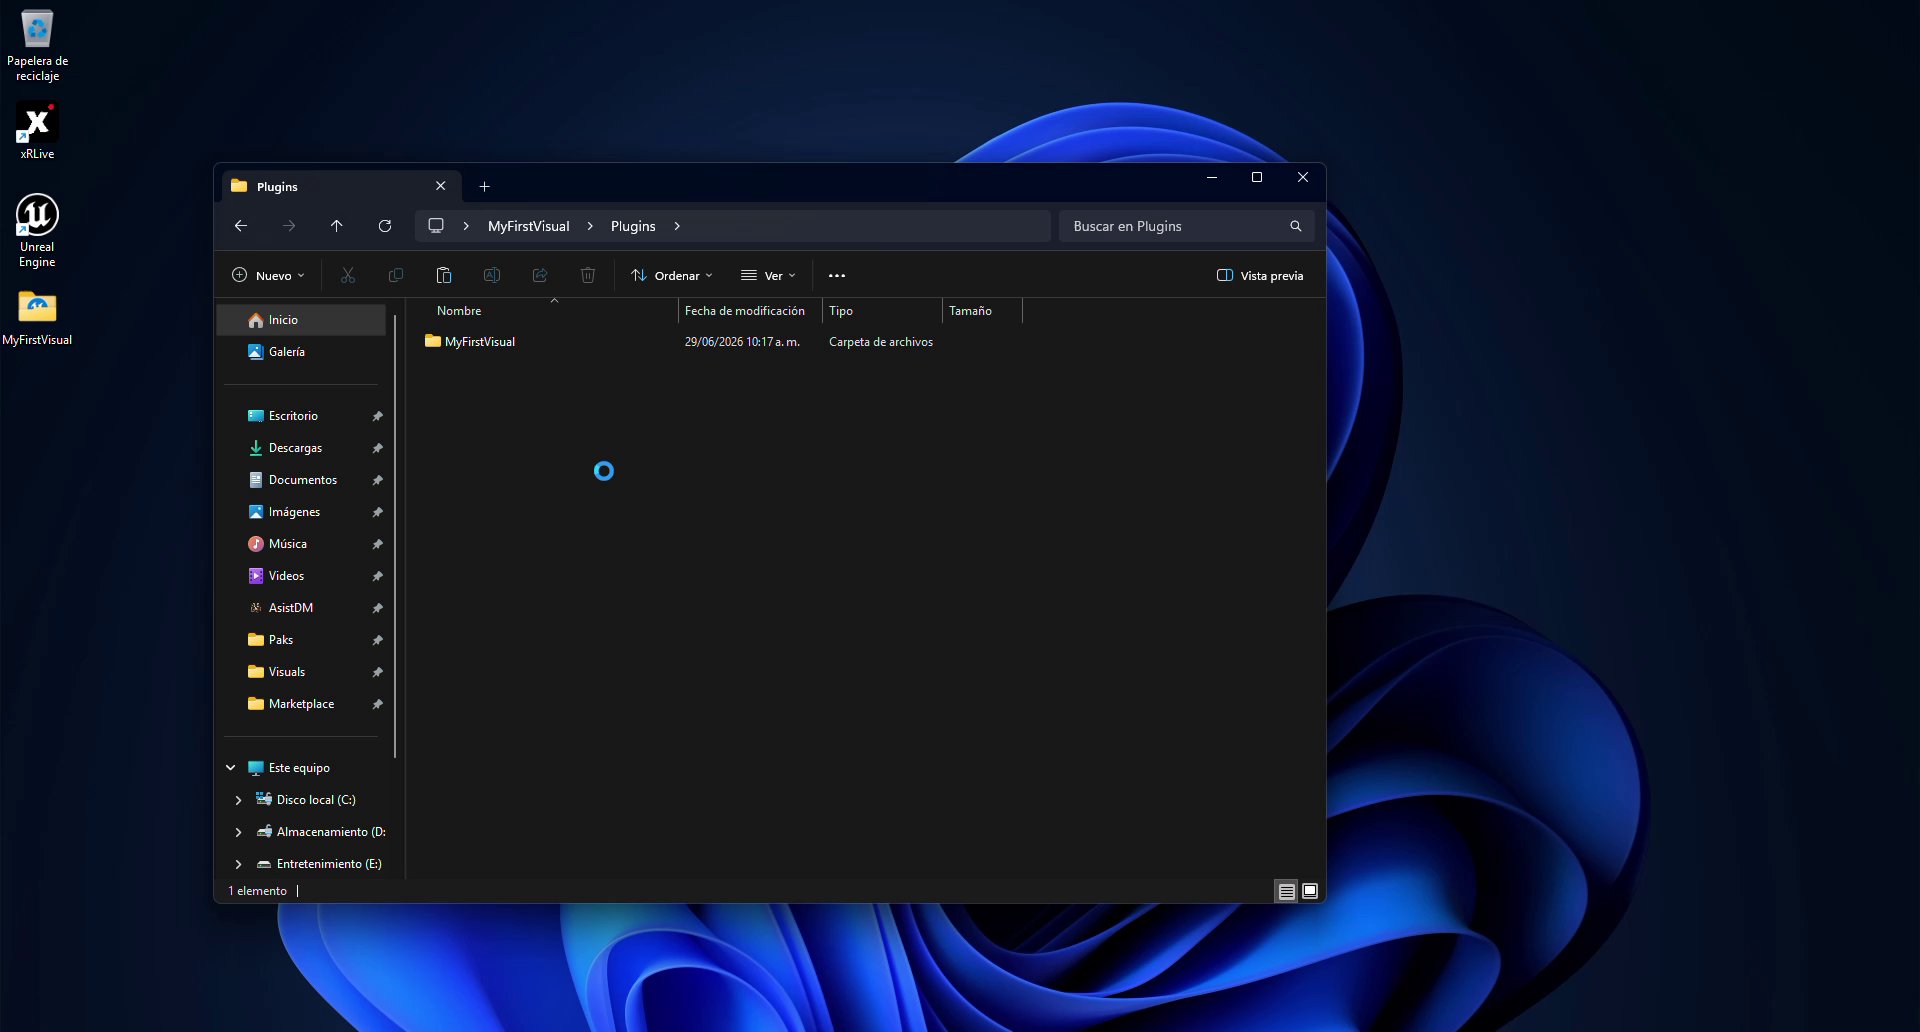 Copy the **xrliveSDK** folder into this `Plugins` directory. After the copy completes, the folder should contain exactly two entries: `MyFirstVisual` and `xrliveSDK`.
If you need the full plugin installation reference — including module details and how to verify the SDK is active — see [Installation](/sdk/installation).
Copy the **xrliveSDK** folder into this `Plugins` directory. After the copy completes, the folder should contain exactly two entries: `MyFirstVisual` and `xrliveSDK`.
If you need the full plugin installation reference — including module details and how to verify the SDK is active — see [Installation](/sdk/installation).
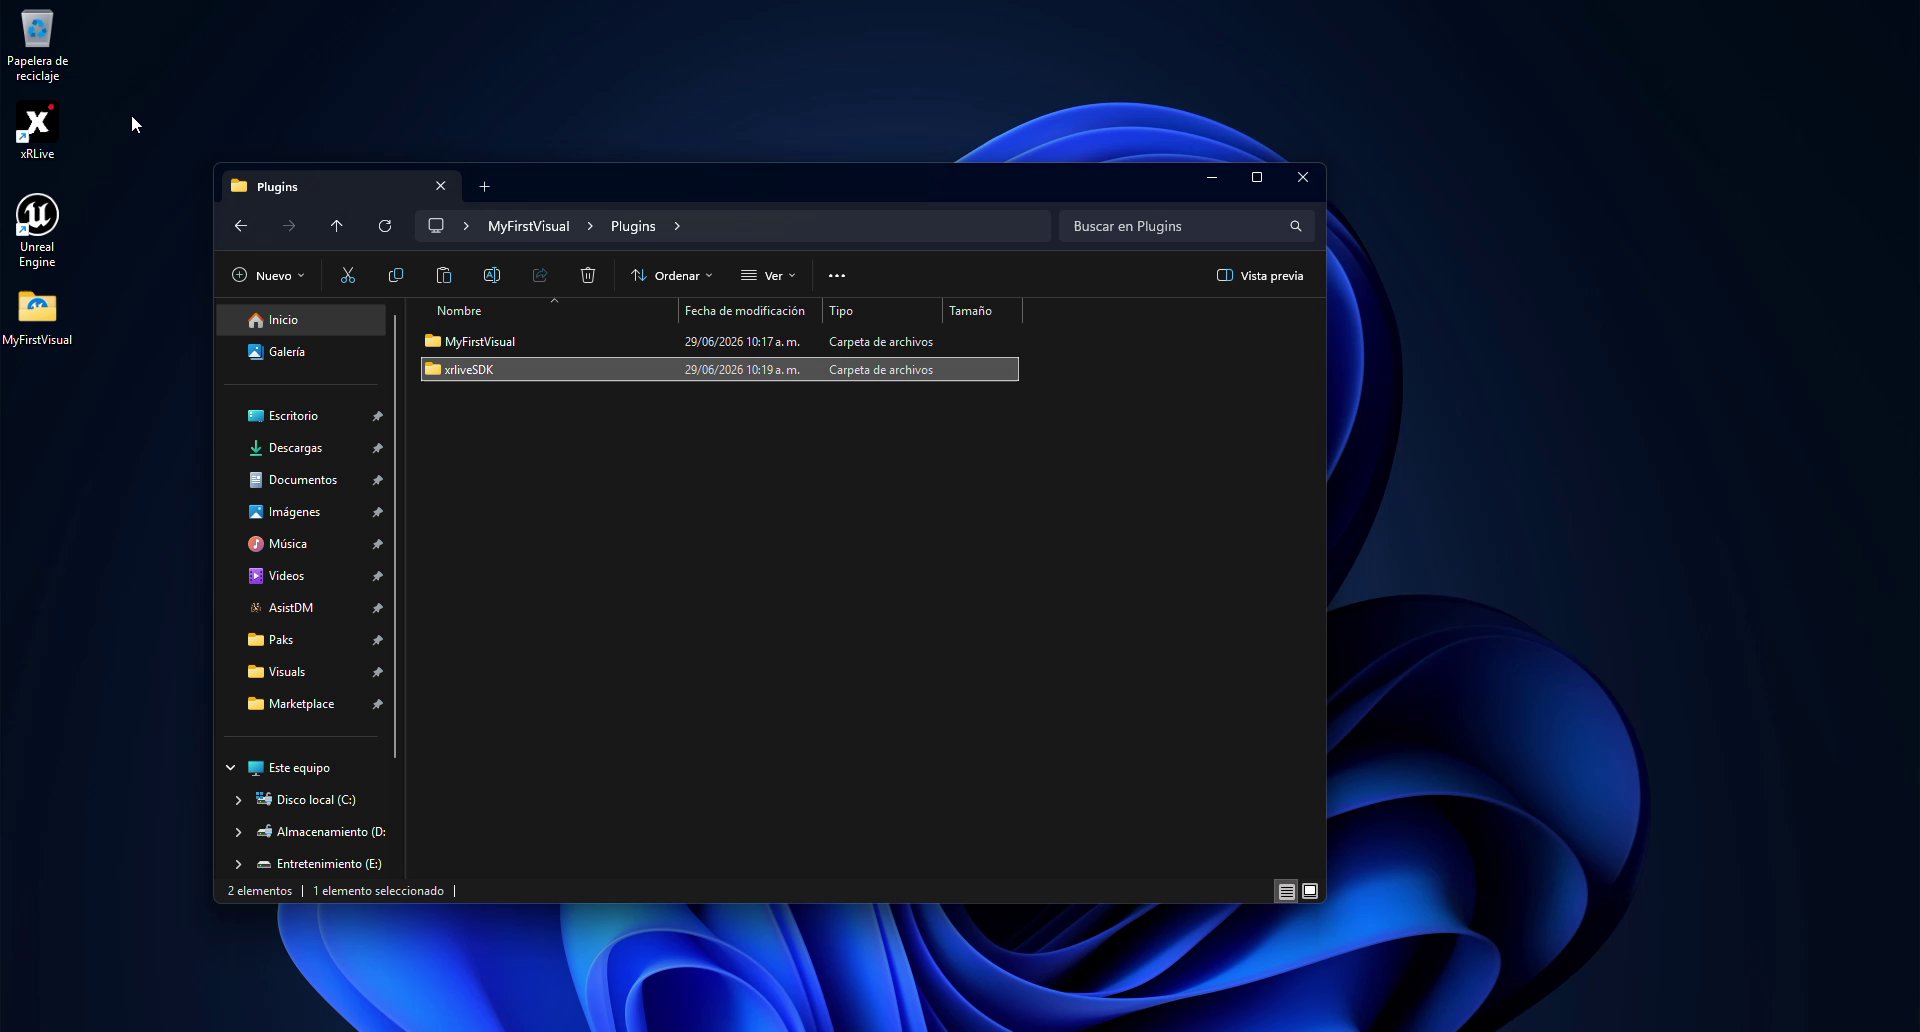 Reopen the project by double-clicking the `.uproject` file. Unreal Engine will detect the new plugin and load it alongside your visual's plugin.
## What you have now
At the end of this step your project has:
* A Blank UE project named `MyFirstVisual`
* A map saved in the root **Content** folder (required by the packaging pipeline)
* A **Content Only plugin** named `MyFirstVisual` with `Blueprints`, `Map`, and `UI` folders
* The main map `MyFirstVisual` saved inside the plugin's `Map` folder
* The `xrliveSDK` plugin present in the project's `Plugins` folder
The project is ready. In the next module you will create the `BP_Settings` actor, add a mesh component, and configure the xRLive UI panel.
Create BP\_Settings, add the Cube component, and configure the xrlive\_UIpanel.
Reopen the project by double-clicking the `.uproject` file. Unreal Engine will detect the new plugin and load it alongside your visual's plugin.
## What you have now
At the end of this step your project has:
* A Blank UE project named `MyFirstVisual`
* A map saved in the root **Content** folder (required by the packaging pipeline)
* A **Content Only plugin** named `MyFirstVisual` with `Blueprints`, `Map`, and `UI` folders
* The main map `MyFirstVisual` saved inside the plugin's `Map` folder
* The `xrliveSDK` plugin present in the project's `Plugins` folder
The project is ready. In the next module you will create the `BP_Settings` actor, add a mesh component, and configure the xRLive UI panel.
Create BP\_Settings, add the Cube component, and configure the xrlive\_UIpanel.